Thursday, August 23, 2018
Tuesday, August 21, 2018
Longish drive
I took the Alfa on it's first drive in a month. After 60+ miles, I've moved past the point of "listening for problems" to "noticing what is great." There's a lot to like.
The engine is loosening up, it's pulling harder and revving easier now. The temperature and oil pressure are perfect. It sounds great and turns a lot of heads.
After servicing the gearbox and differential, the two major mechanical items that were not rebuilt, I was concerned a hidden gremlin would be lurking. They both feel good - the modern synthetic oils are working their magic - the drivetrain gets smoother with each drive.
The Koni Sport dampers and Alfaholics lowering springs are fantastic. The naysayers are crazy - the handling is much improved - there is no bump-steer and the ride is "sporty." And the new stance looks good:
I'm looking forward to hitting the 500 and 1,000 mile marks!
123 Ignition distributor installation
Installing the 123 Ignition distributor should have been a straight-forward task, but the Bosch unit threw us a curveball. When I was removing the later, the oil seal fell off and onto the drive gear. Since it is dark, and filled with a minute amount of oil, the o-ring completely disappeared.
That pesky little piece of rubber prevented us from installing the new distributor - and caused about an hour and half of head scratching. Eventually we found the problem and everything was a bit more straight-forward.
Once we went through the installation procedure, including programming the unit from my iPhone, the engine ran better immediately.
Alfaholics recommended curve:
The next day I ran all the wires inside some automotive wiring tube and made everything neat and tidy.
Saturday, August 18, 2018
Monday, August 6, 2018
Lowering kit installation part 2
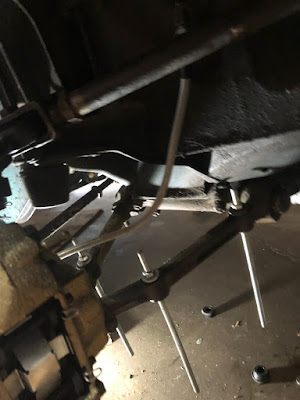
With the rear suspension finished, we moved to the front of the car. Our first task was to remove the sway bar.
Next, we used the Alfaholics 'Spring Tool' and a hydraulic jack to drop the spring assembly. It takes about 20 minutes per side.
When the front spring pans drop, be prepared for a shower of rust and dirt.
The aluminum pan spacers were completely corroded and beat up. Fortunately, the lowering kit does not use them.
Everything else, the pans and seats, was in good shape. So we cleaned, sanded and painted these parts.
The rubber donuts looked brand new after washing.
Again, the [old] front dampers were seized.
The Koni Sport dampers went in easy. I used one twist on the front, and the factory settings (full soft) for the rear.
Installing the lowered springs takes some time. We used the installation tool and a hydraulic jack to lift the assembly.
New 29mm sway bar installed.
Sump guard back on.
Lowering kit installation part 1
Over the past two weekends, we installed the Alfaholics lowering kit.
We started with the rears, which involves dropping the rear seat to access the damper 'hats.'
We started with the rears, which involves dropping the rear seat to access the damper 'hats.'
Old Bilstein shocks out. One side was completely seized while the other was very stiff.
We used spring compressors on the passenger side. This proved to be a waste of time. Putting a hydraulic jack under the rear pan works fine and is much faster.
The new spring is much shorter and lighter.
New Koni Sport damper & lowered spring in. The axel straps had to be shortened about a 3/4 of an inch.
We also removed the rear sway bar. The rear arm bushes looked excellent, but the T-bar bushes will need replacing - another project!
Subscribe to:
Comments (Atom)


